
For one 2½ inch tall Pipe-cleaner doll you’ll need:
– 1 12-inch pipe cleaner (for one doll)
– Flesh-colored embroidery floss (I used DMC 3774), as well as other colors to match felt
– Felt for clothing
– Wooden bead for head (10mm-15mm)
– Acorn cap for hat
– Fuzzy yarn or wool roving for hair
– Scissors
– Ruler
– Glue
– Optional: Acrylic paint, colored pencils or permanent pen for face
(You may also wish to embroider the clothing, so for easy embroidery instructions click here.)
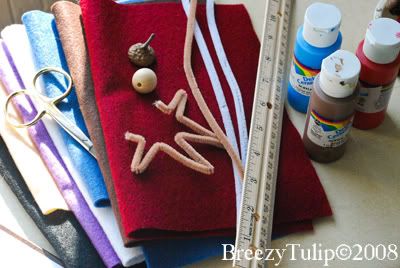 Here are some of the supplies to give you a visual. Make sure you have plenty of flesh-colored floss for the body!
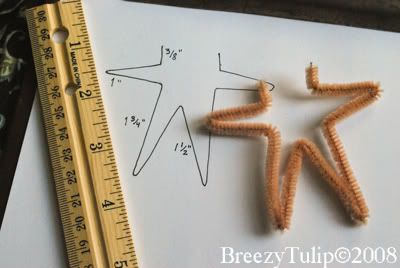 First you will want bend the pipe cleaner following these measurements: for the neck, ¾”; for the arms 1″ both ways; 1¾” for the outside of the legs; and 1½” inside the legs. This should use up the whole pipe cleaner.
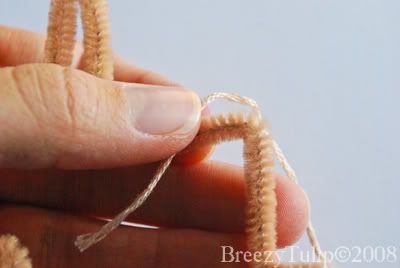 To begin wrapping, unbend one of the hands, hold the embroidery floss on the pipe cleaner…
 …and wrap it around the pipe cleaner! It’s pretty easy. Just make sure you twist out the floss from time to time so it will fan a bit, creating better coverage. (Once you get going you’ll understand – it may start to twist back on itself.) (While working, I hold the pipe cleaner with my left hand, and wrap with my right.)
 Once you have the tip of the hand wrapped, bend it back in place and wrap both sides together. Continue wrapping up the arm until you reach the body. Repeat this with the other arm as well.
 The feet are wrapped the same way as the arms, though you may wish to use another color for shoes. When switching colors, don’t tie a knot – it’ll leave a bump. Rather, wrap the flesh color over the remains of the shoe color, and then continue wrapping towards the body.
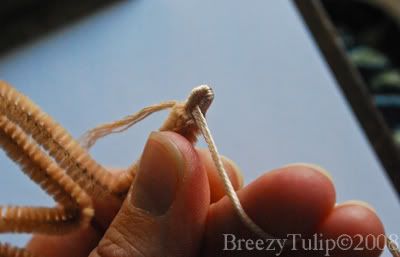
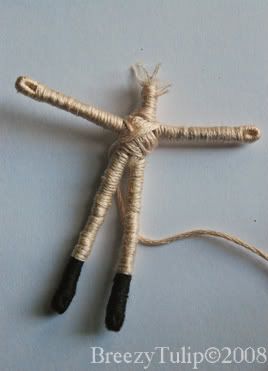 Once you finish all the limbs, wrap the body and the neck like so.
 Take your wooden bead and make sure it fits on the neck. Use the glue to attach the hair, then the cap on top. You may wish to pencil the face on at this point. (This step you may do before or after you sew the clothes on. Just don’t glue the head on yet.)
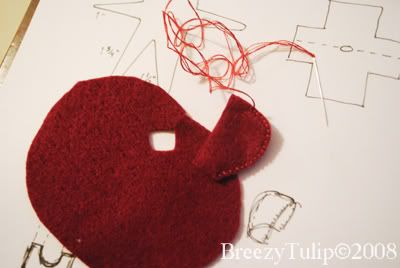
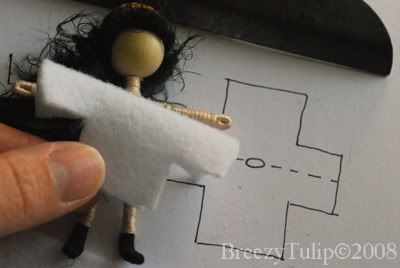 This is the pattern for the basic shirt. Make the sleeves as long or short as you wish. Fold it in half to cut the neck hole as well. A jumper or dress can be made in a similar manner, adjusting neck and skirt area as necessary.
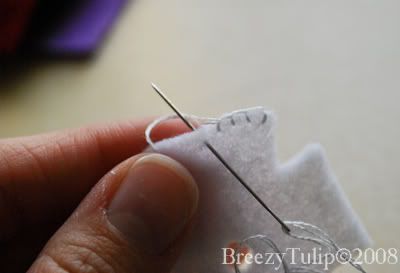 Make a buttonhole stitch along the ends of the sleeve and bodice, tying it off on the inside. (If the shirt will be under a jumper, finishing the bodice won’t be needed.)
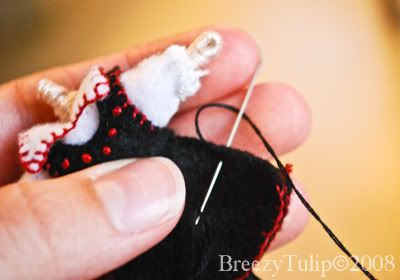
 This is the first time I’ve ever added a collar to a shirt, and it was very easy. Embroider with the buttonhole stitch before attaching it to the shirt. Slip the shirt over the [headless] neck and body, then sew the sides together with the buttonhole stitch.
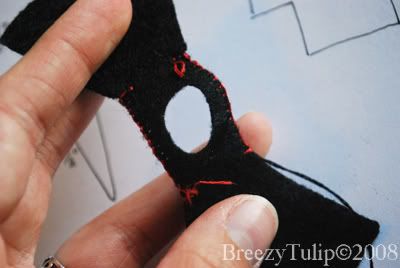 Here is what the jumper looks like underneath, while finishing the armholes. I usually like to decorate the front with simple embroidery.
 Sewing up the sides…
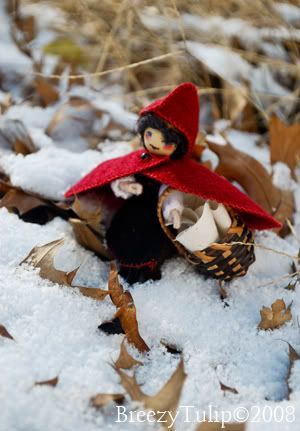
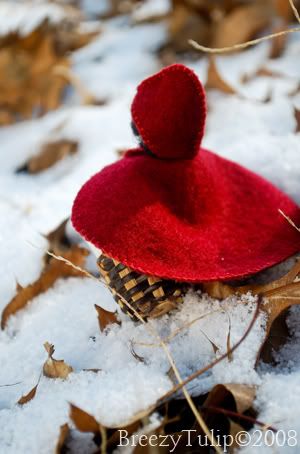
…Making a simple hooded cape. After gluing on the head, painting on a face, and trimming the hair, you now have your very own pipe cleaner doll!
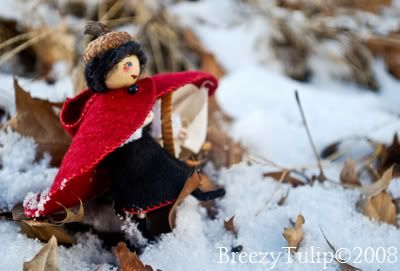
 And here is Little Red Riding hood!
For another tutorial on a variation of the wee doll, click here.
Coming soon – wee pants tutorial!


5 thoughts on “Little Red and the Pipe Cleaner People”